
Phomemo M02 Mini Thermal Printer Review - and how I use it in my bujo
Disclosure: Some links in this blog post and its accompanying Youtube video are affiliate links. If you make a purchase through these links or use my discount code, I’ll make a small commission. Your price will not be affected at all - but your purchase will help to support me, my little blog and my Youtube channel, which is always greatly appreciated. This review was conducted using a gifted Phomemo M02 Mini Thermal Printer and thermal paper.

If you’ve never heard of thermal printing, prepare to have your mind blown - it’s a printing process that doesn’t use any ink at all. Instead, it uses special thermal paper that reacts to heat - and you can even get tiny ones like the Phomemo M02 Bluetooth Portable Mini Printer! They can only print black and white, so you’ll have to stink to your inkjets and laser printers for colour printing, but there are so many ways black and white custom printing (on STICKER paper!) can be useful. I’ve been testing this adorable mini printer as a bullet journaling tool for the past month. Read on to hear how it went - or you can see it in action in the video below.
Want to get your own Phomemo M02 portable printer? Use my discount code ERINSMITH for 10% off at checkout on Phomemo.com
Mini, portable, and super cute
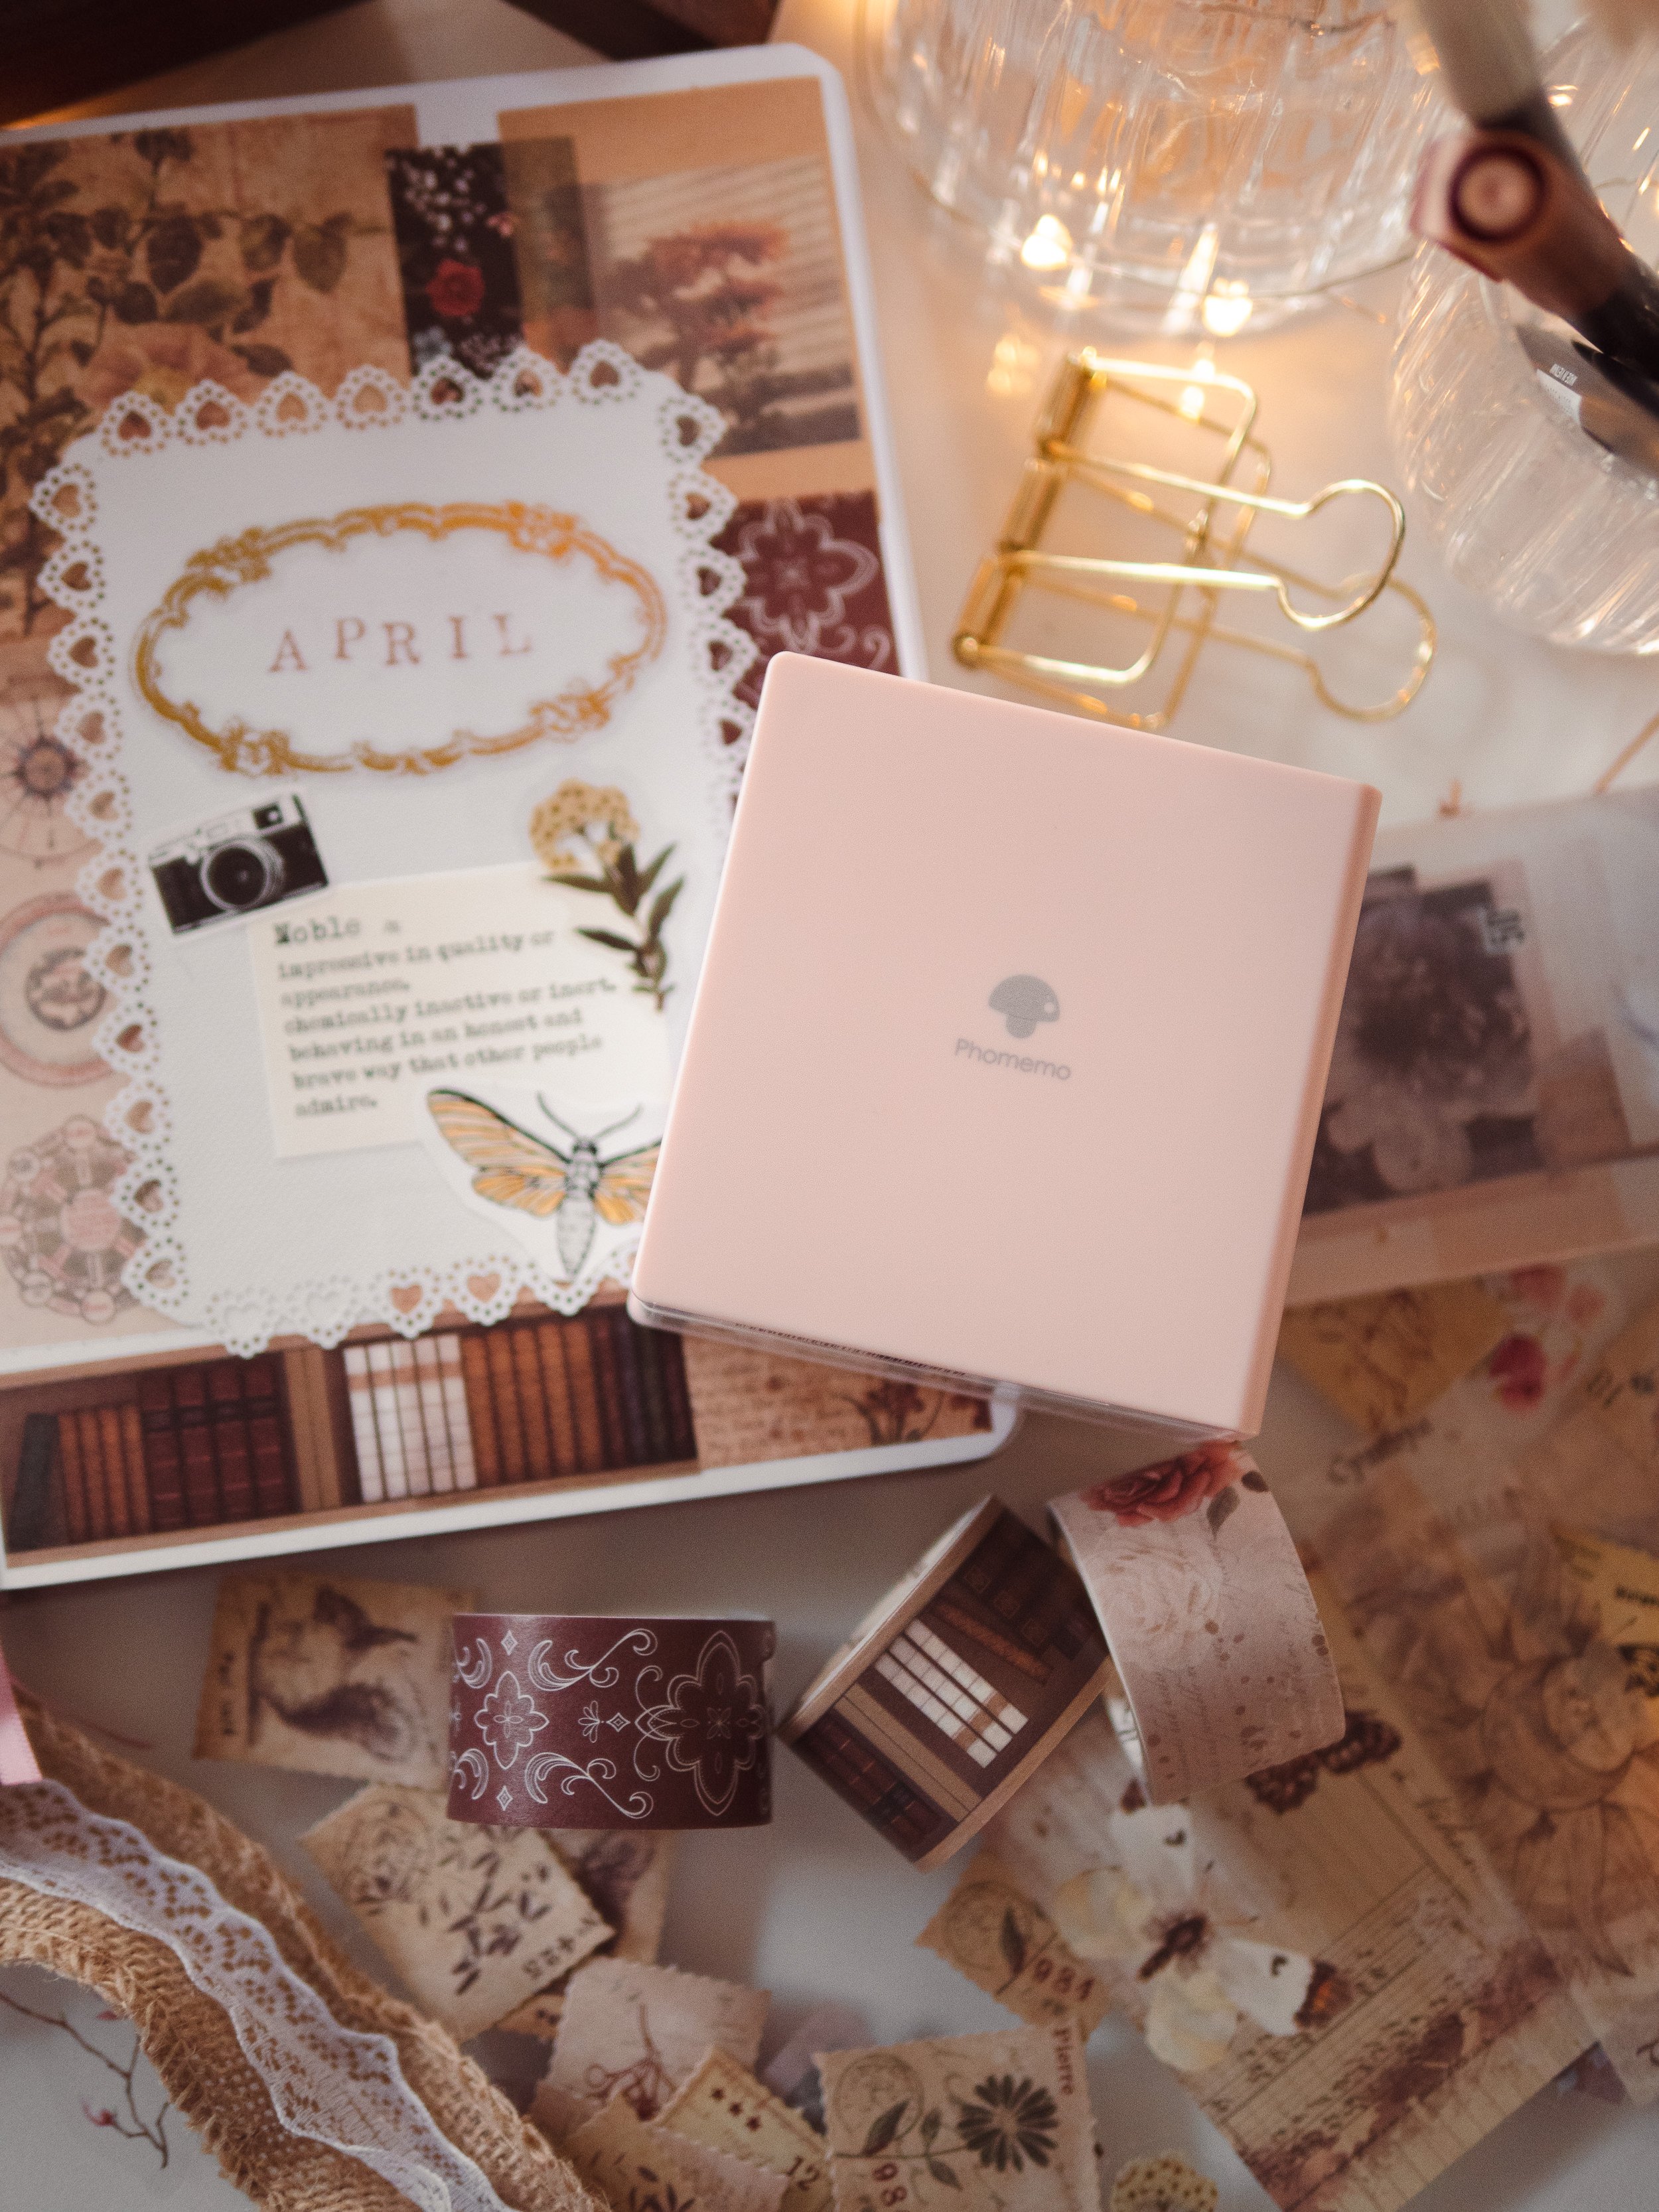
The M02 mini comes in black, white, pink, green, blue and a cute piano pattern. And it’s SMALL! It measures just 8.5cm wide, 8.2cm long and 4cm tall (that’s 3.3 inches wide, 3.2 inches long and 1.6 inches tall for my imperial friends!). I opted for the pink version, and it’s much more pastel than it appears on the Phomemo website - I actually prefer the colour it is in real life over the bright pink it appears to be online.
I keep it in my desk drawer tucked in beside my washi tapes, and it never gets in the way. Being wireless, you can also toss it in your bag and take it with you on the go if you’re someone who does most of their planning at school, in the office, or if you like to work in libraries and cafes like me.
How does the M02 thermal printer work?
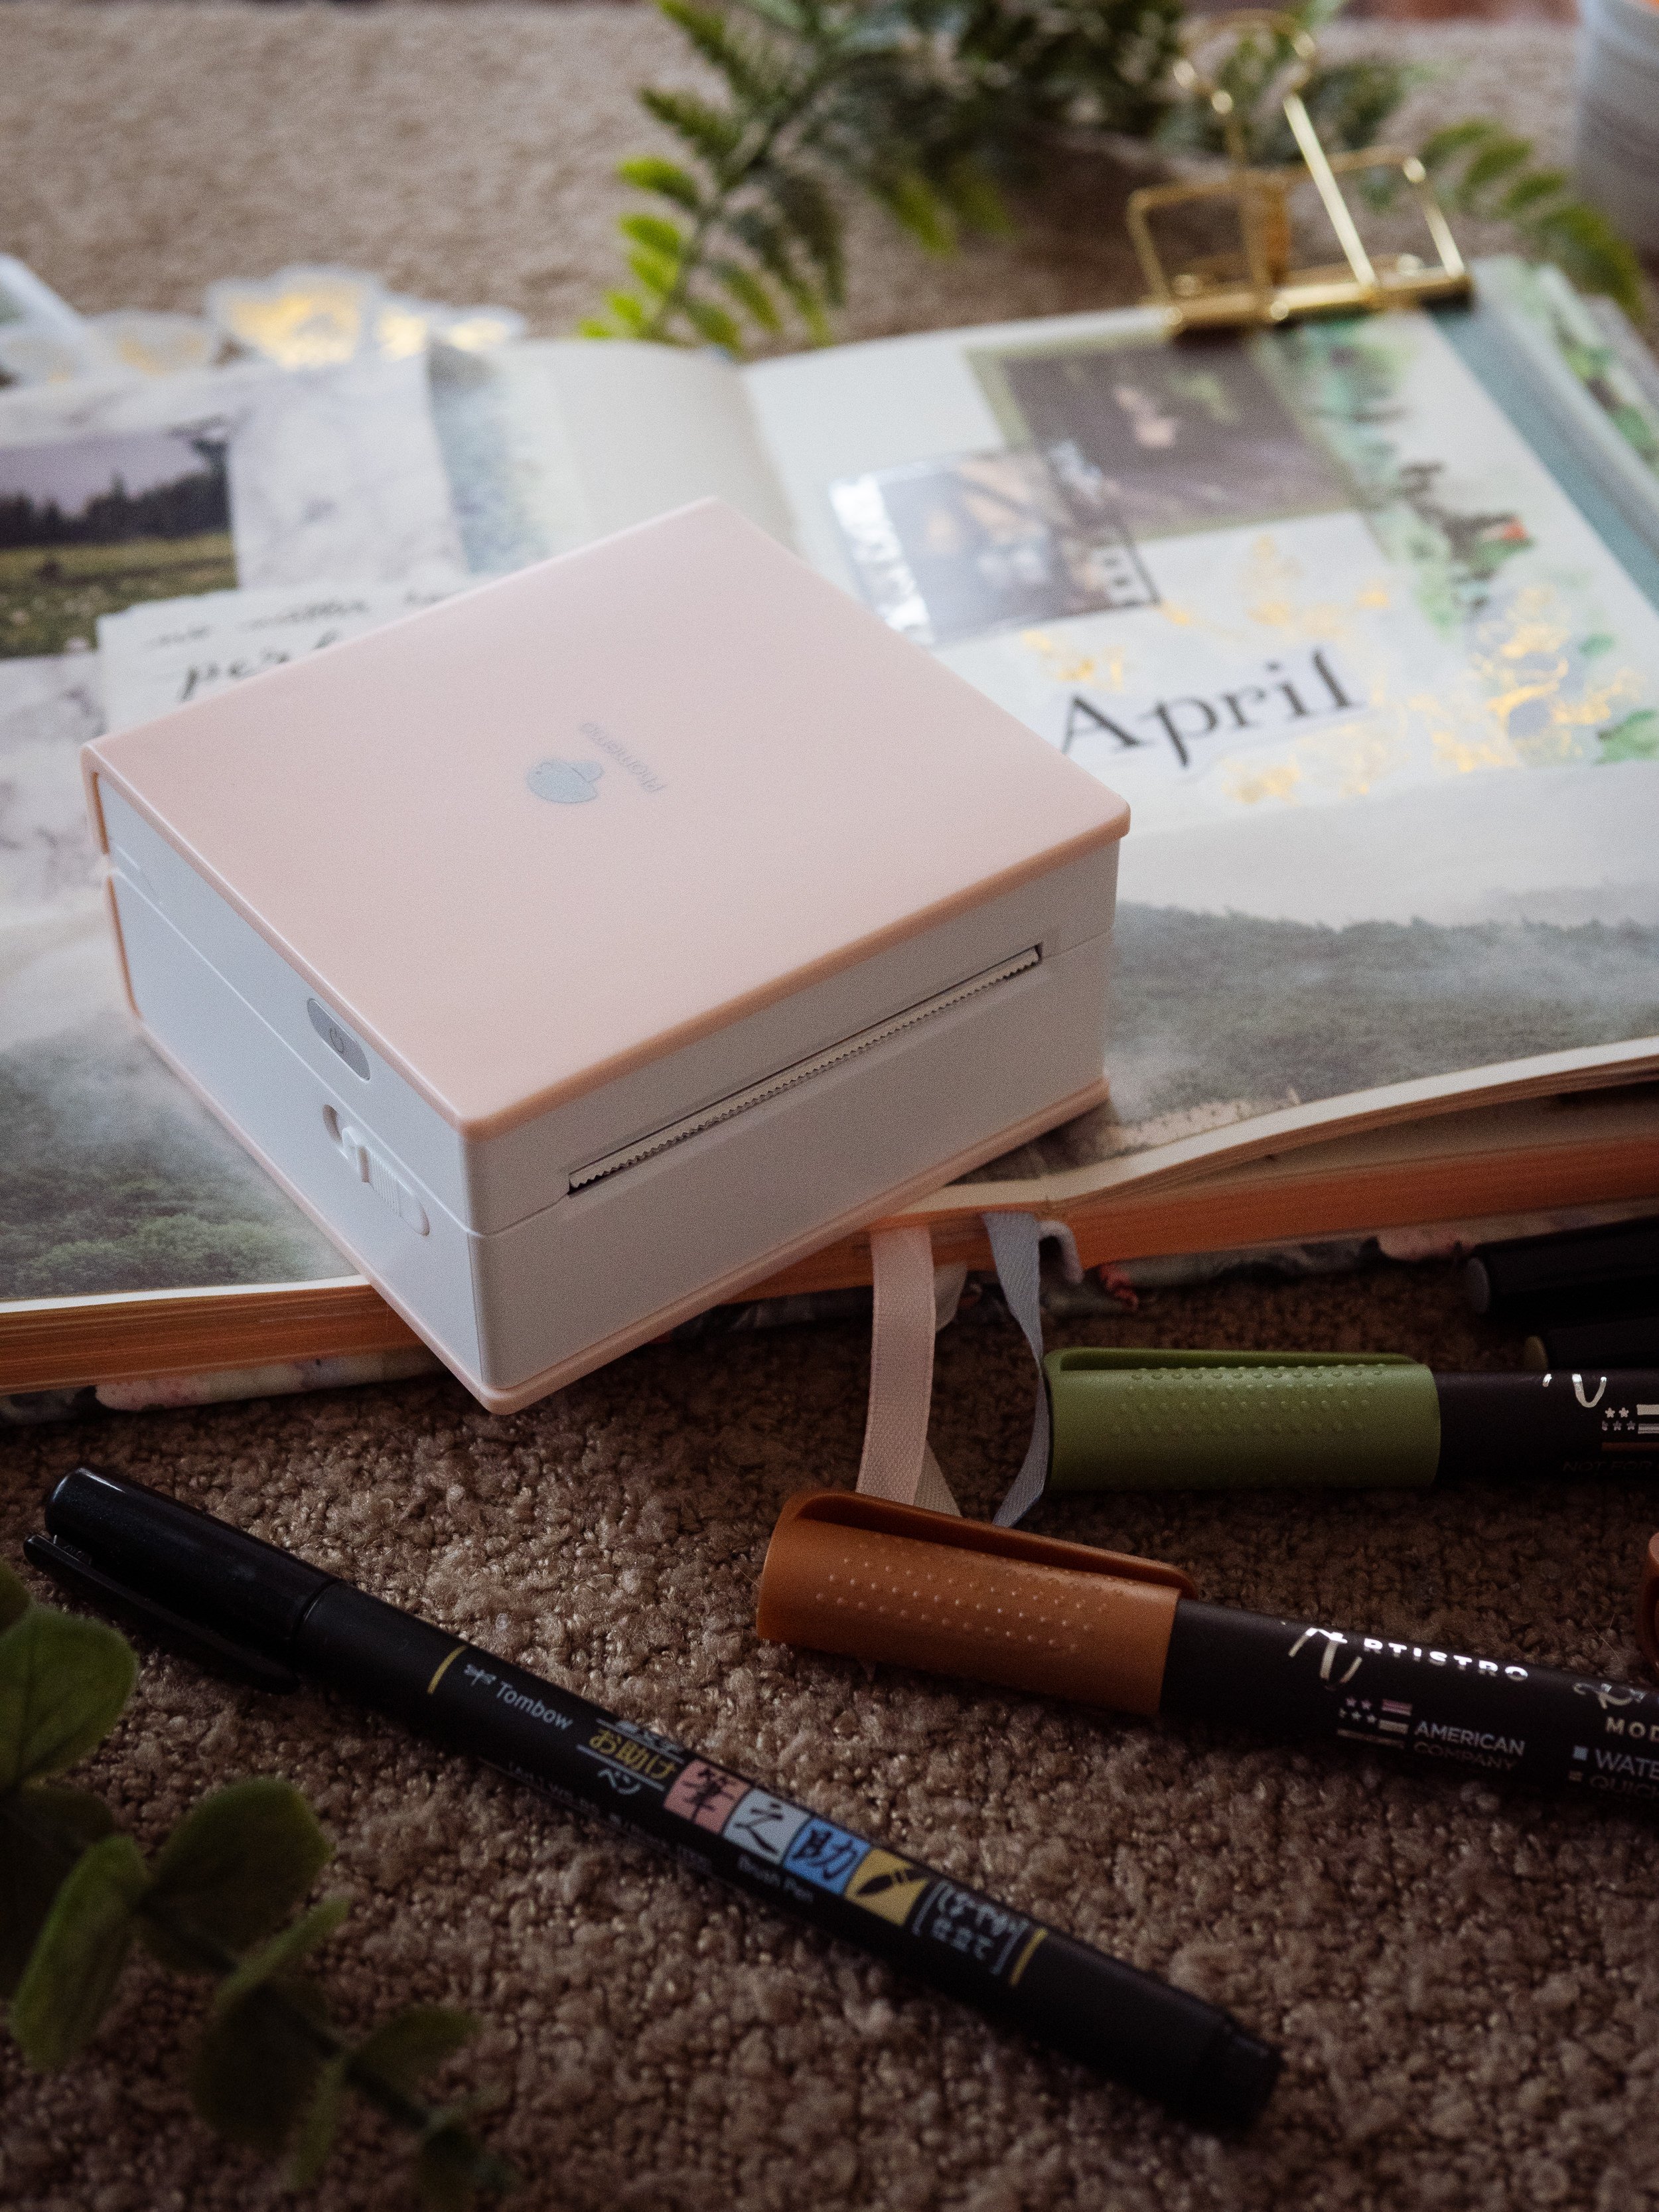
The M02 printer is rechargeable and comes with a micro-USB cable. You’ll need to charge it before its first use, and the battery life lasts a LONG time - I’ve only charged it once so far! Apparently it can print up to four full paper spools on a single charge! That’s a lot of paper!
The on-off button lights up, with the light colour and frequency being significant - a green light means the printer is on and ready to go, a red light means something is wrong, like the paper has run out or power is running low. A flashing red light means it’s time to charge your printer, and the light will blink green while it charges.
To use the printer, you’ll need the Phomemo app on your mobile device. You can connect to the printer with Bluetooth, and within the app print whatever you’d like - text, labels, graphic elements, even photos - with just a few touches. It even has options to adjust coloured images - a bit like the threshold effect in Photoshop - so you can get the best printing outcome.
What can I print with my Phomemo printer?
The Phomemo app comes pre-loaded with a bunch of cute designs - like to-do lists, borders and frames - but you can also add your own elements. My favourite way to get things to print is Canva. I just load up one of their templates or a blank vertically oriented page, tweak things so they’ll work in black and white, save the image to my phone and then import it into the Phomemo app to send to the printer. The possibilities are endless - especially if you have a Canva Premium subscription!
How can I use thermal printing in my bullet journal?
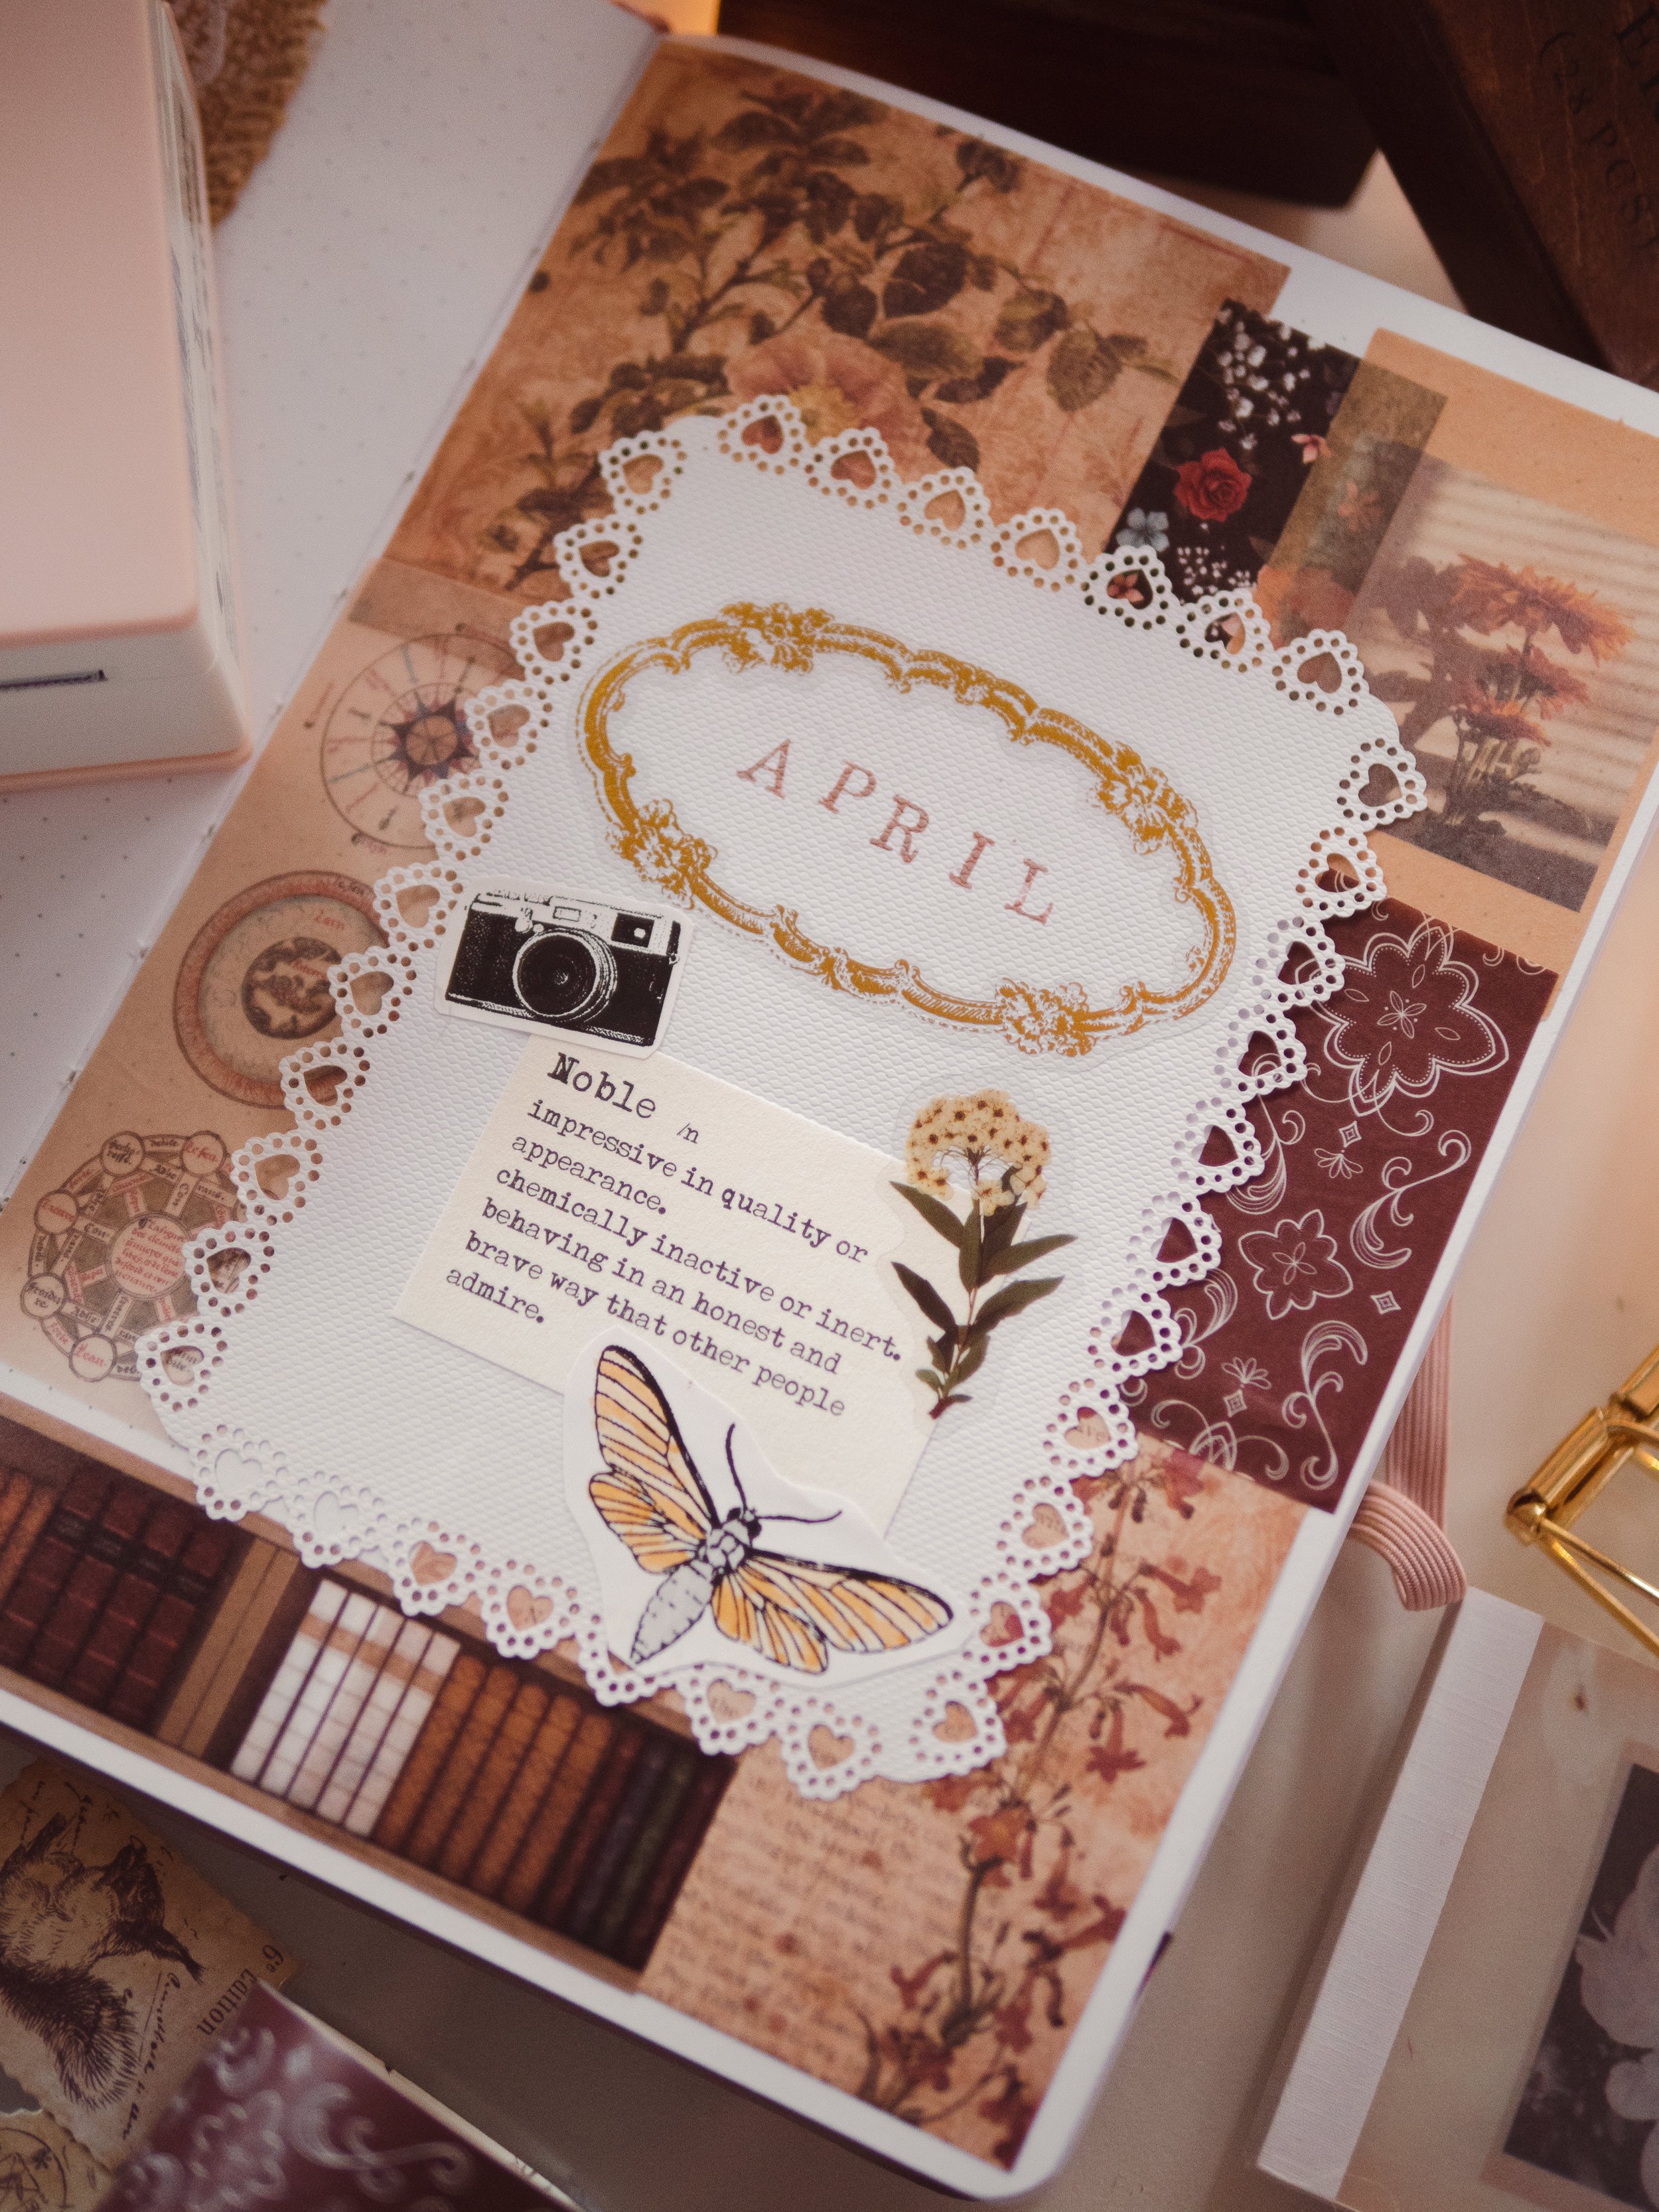
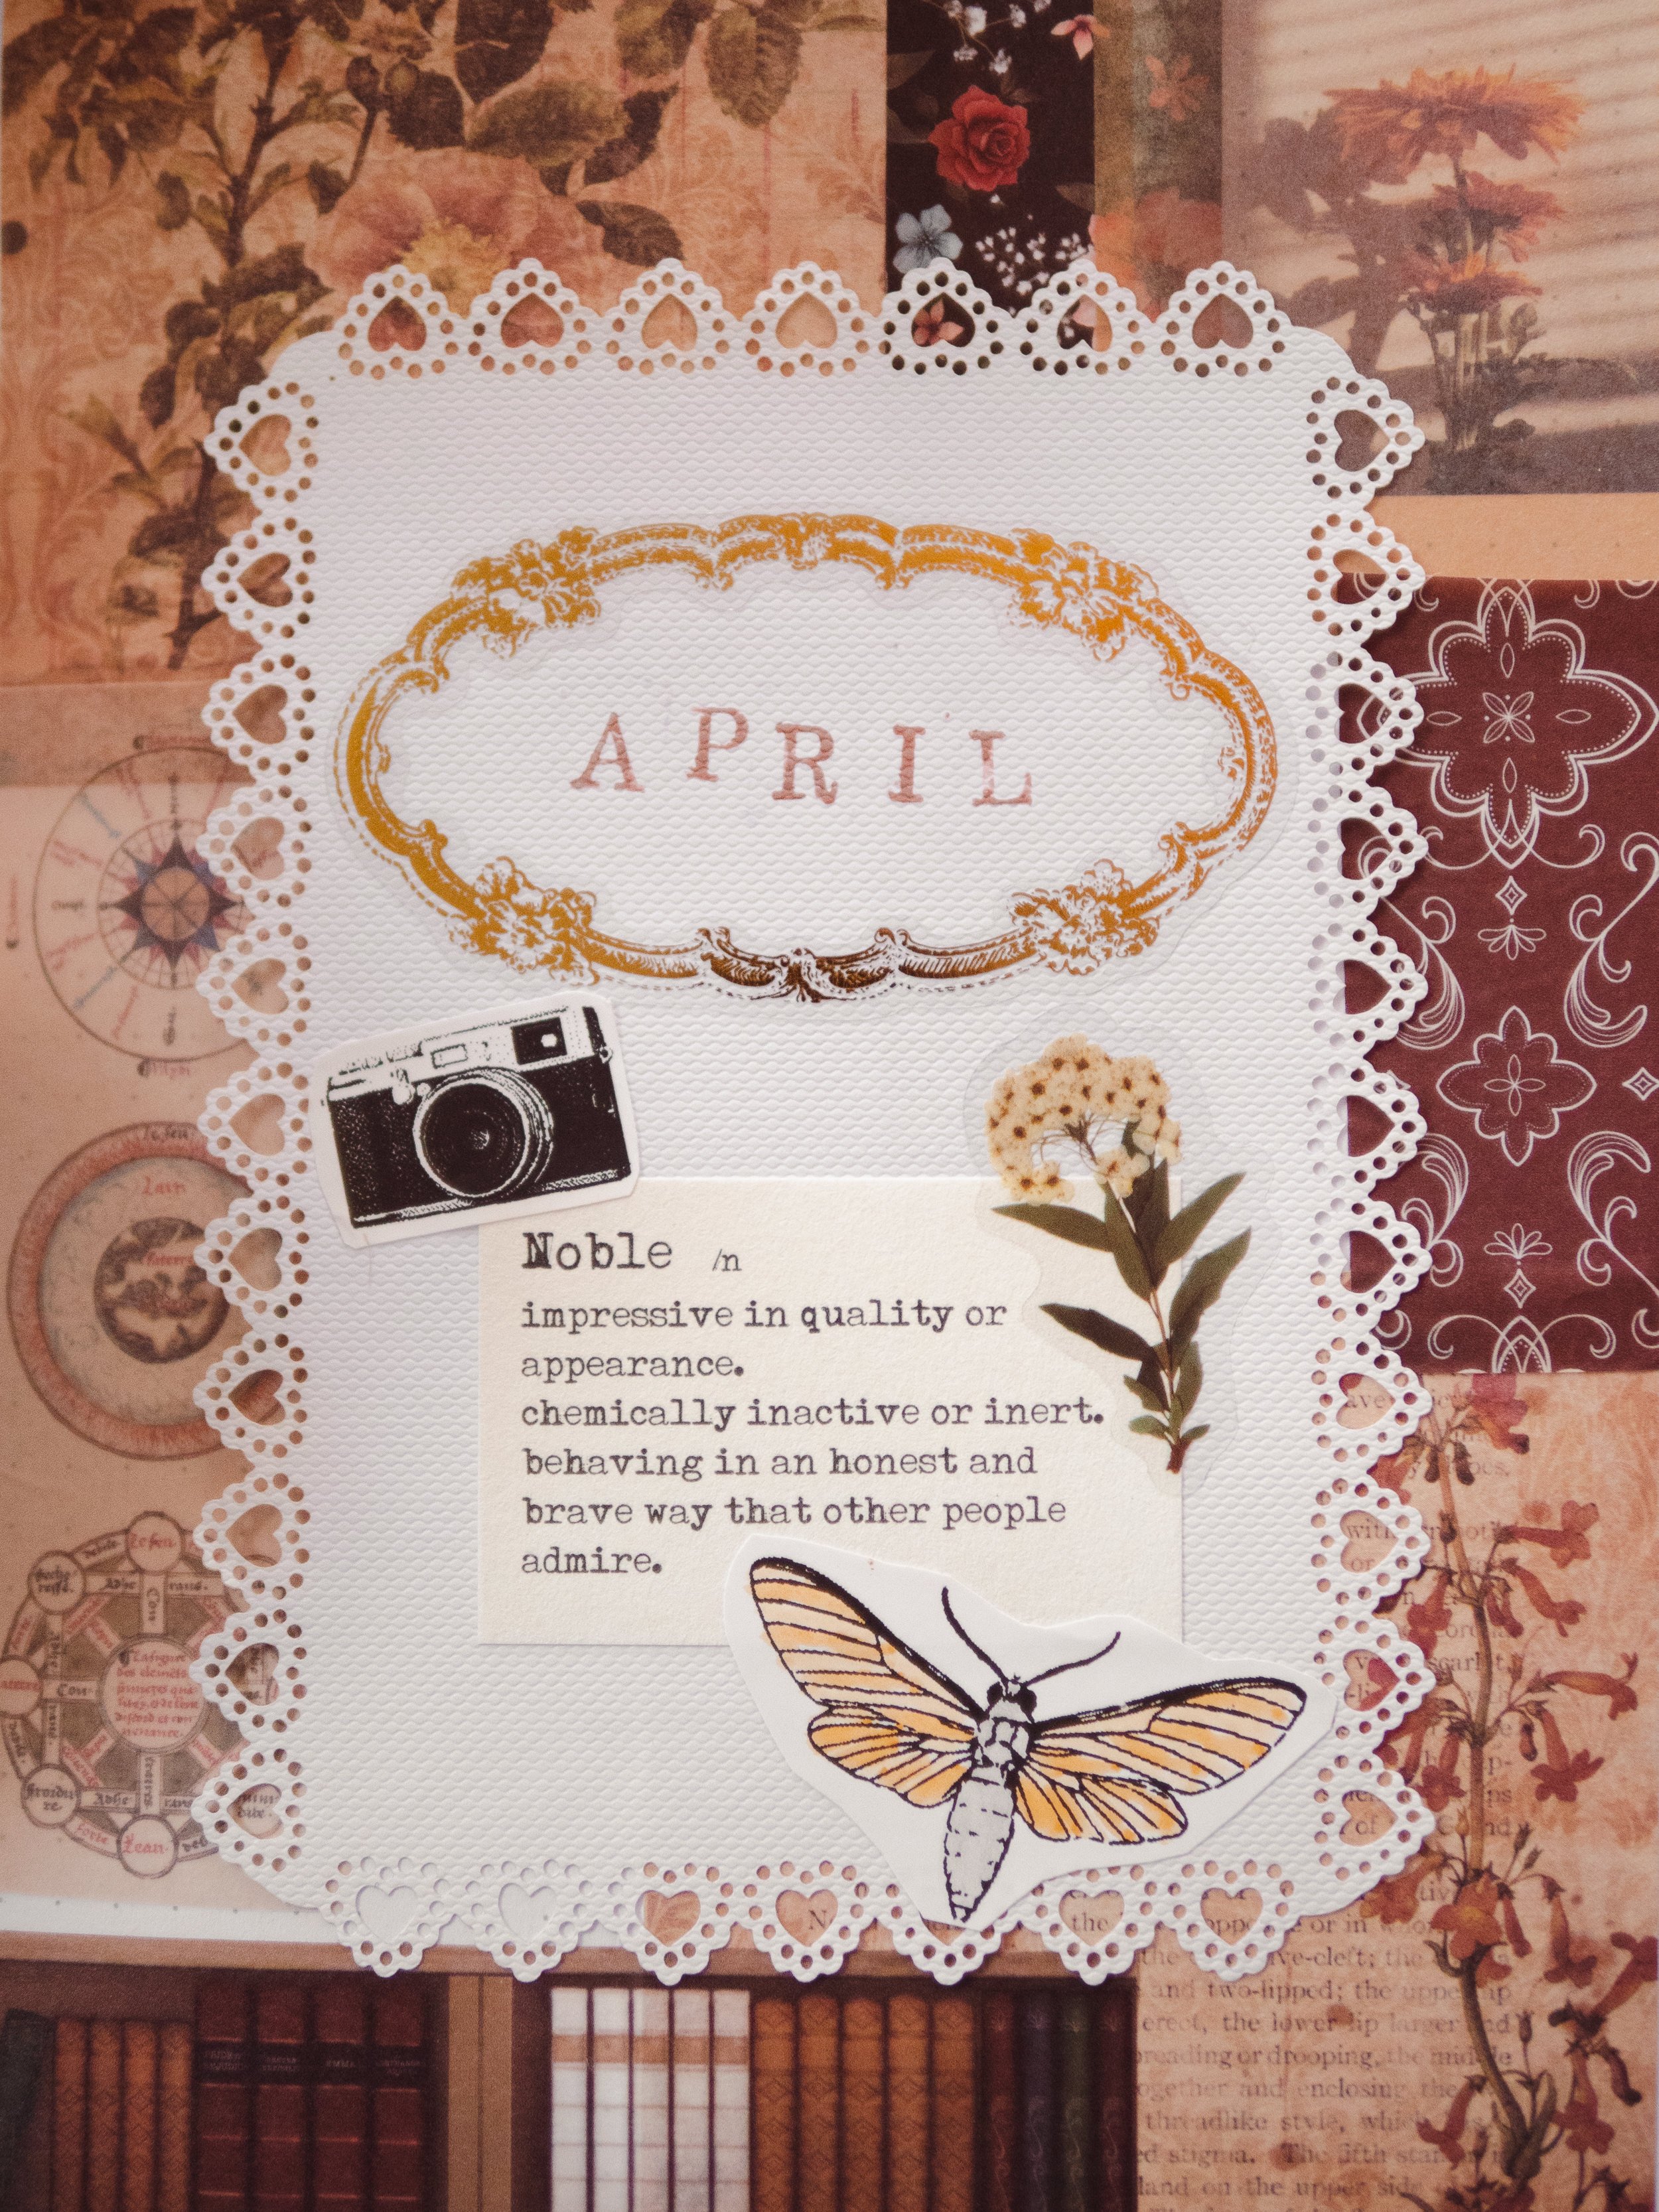
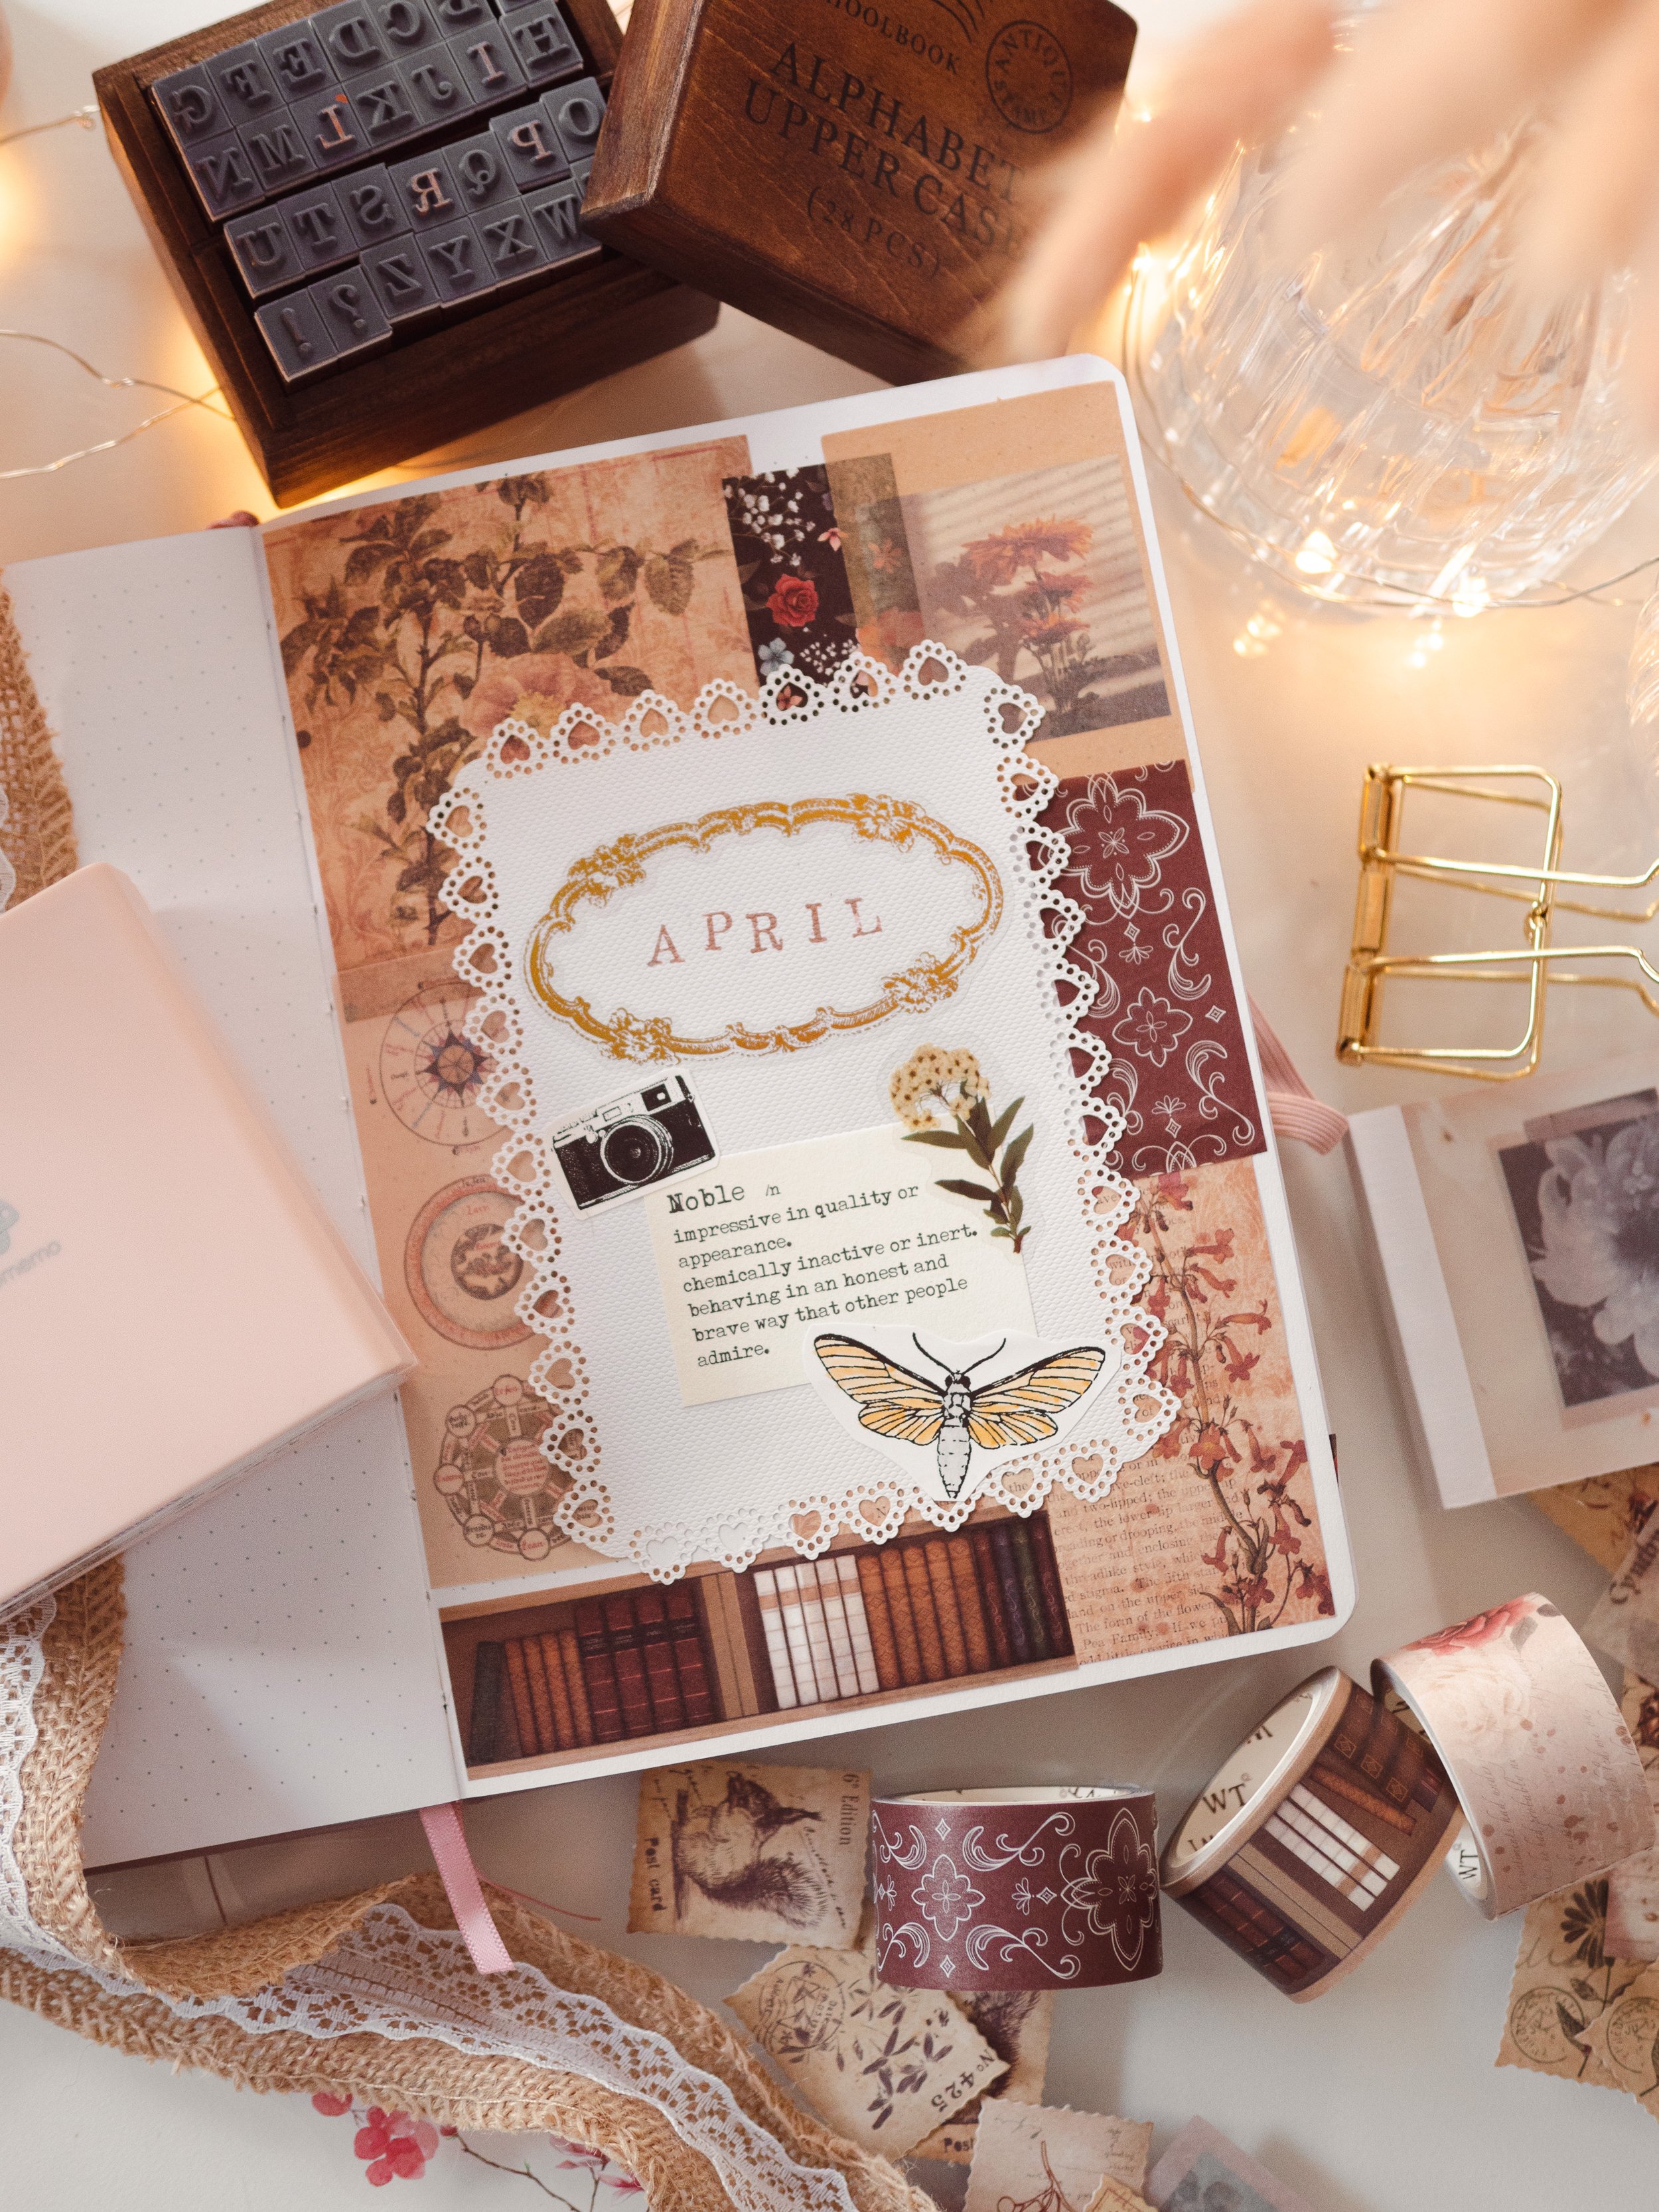
Oh man - the possibilities are endless. If you don’t fancy yourself a skilled doodler, you can use the printer to add decorative elements. In the above photos for this cover page, I used the M02 mini printer to print the camera and the moth - which I sourced from Canva. I knew I was going for a vintage/academia kind of look, so I used Canva to find elements that would work with what I envisioned. I just saved the Canva project as an image to my device, imported it into the Phomemo app, printed it, cut it to size, peeled off the backing and stuck it down like any other sticker. Then I added colour to the moth with Tombow dual brush pens. The printer paper I’ve used here is a little shiny, so the marker colour doesn’t go down as easily or as saturated as it would on your regular journal paper, but it still works great!


Perfect time-saving calendar setups
I got REALLY excited when I realised how easy calendars can be now! This setup is for April 2022 (yes, again… this was an experimental project, while this is the April setup I’ll actually use), so I checked where the days would fall and made a calendar template for my calendar and habit tracker pages. Then I just printed it seven times and stuck it down! I left mine without numbers so I could use it for the habit trackers easily and just added the numbers on the calendar page, but you could add the numbers too. Imagine how easy a future log could be with these! No more cramping hands!
The “April” heading is hand lettered, but the leaf and star garland design is from Canva via the Phomemo M02, and the floral frame on the habit tracker page is one of the included designs that comes with the Phomemo app! I just added my hand-lettered heading straight onto the sticker with a Sharpie pen.


Print in black and white, and add your own colour
On the gratitude and brain dump pages, I wanted to test out how colouring the thermal-printed stickers with paint pens would go. The heading on the gratitude page is actually just half of the same printed border from the gratitude page, trimmed right down. The books at the top of the page are a Canva element, and I used my Artistro brush tip paint pens to colour them. The regular paint pens were perfect for this - the metallic ones are actually so opaque that they cover the


Lettering and titles
I know hand lettering can be a big hurdle for a lot of bullet journal users, so I wanted to test the Phomemo M02 out with some titles too. For this weekly I’ve teamed up some washi tape and stickers for each day, and layered them with one of my favourite Canva script fonts.
The white edges are a bit obvious - Phomemo also sell transparent and semi-transparent versions of their paper rolls, which I think would work much better for this purpose! They also have coloured paper options, so you can print on colours other than white - but the printer will still only make black marks on the paper.
I didn’t want my weekday titles to be too big, so I kept them horizontal, but if you wanted BIG lettering you can make it happen! You’ll just have to turn the design lengthways.
Everything I used to make this journal set up:
Phomemo M02 Mini Bluetooth Portable Thermal Printer
Notebook Therapy Sakura A5 dotted notebook in blush pink
Sharpie pen
The Washi Tape Shop Academia washi tape set
Vintage paper set
Lace paper
Clear flower stickers
Upper case alphabet stamps
Artistro brush-tip paint markers
Botanical postage stamp stickers
Vintage washi stickers
Vintage rose scrapbook paper pad
Tombow dual brush pen 991 light ochre
Tombow dual brush pen N89 warm grey
Tombow dual brush pen 020 peach
Glue tape