Four Easy Bullet Journal Weekly Layouts for Spring

If you live and die by your weekly spreads like me, you know finding the RIGHT weekly is crucial. Some prefer horizontal weeklies, some prefer vertical, some like a single page weekly while others prefer a whole spread. If you’re still finding your weekly groove, try these four easy weeklies and see what works best for you!
Disclaimer: some links in this post are affiliate links. If you choose to make a purchase through those links, I may earn a small commission.
Each one of these weeklies could be decorated in a multitude of ways, but I’ve decided to keep it swift and simple - washi and stickers - to make sure they are accessible for everyone.
I’m using an A5 dotted journal from Notebook Therapy for this setup, which has 26 spaces across and 38 spaces top to bottom on a single page. I’ve included the dot spacing details for each of my layouts below, but if you’re using a larger or smaller notebook than me then you may need to adjust these designs to fit your book.
I’ve used a Sakura Pigma Micron 03 pen for all the fineliner work in this setup, and brush tip paint markers from Artistro for all the coloured pen work.

Vertical Column Weekly Spread
This vertical weekly is one of my go-to layouts when I need a lot of space for to do list items that apply on certain days. The space at the top can be used for events, while the bottom part of each column is for tasks, and if you have more events in a single day than me - like if you need to fit a full class timetable in there - you can bring that dividing line lower.
Each of my columns are 6 spaces wide, and I’ve positioned them so they have a bit of negative space above and below, as well as on the left page. For some reason having Monday to Wednesday on one page and Thursday to Sunday on the other feels the most comfortable to me, but you could have the four columns on the left and three on the right if you wanted to!
I’ve used the Tenohira Sakura washi tape set from the Washi Tape Shop to decorate this spread in a minimalistic way - just a solid strip of tape down the left side, and I’ve cut around the design to make some DIY washi stickers as well. I don’t often fill up ALL of the space in the task section of the columns, so I’ve deliberately layered the washi stickers over the bottom of the lines.
I find this layout looks extra polished and sleek when done with a ruler, but if you prefer to freehand your lines then go for it! It will have a much more relaxed and whimsical feeling with less precise lines.
Not into washi tape?
No worries! You could skip the decoration altogether for a very clean and minimal spread, or use stickers, papers or doodles to decorate your page instead. Think of the design like a doll waiting for you to dress it up!
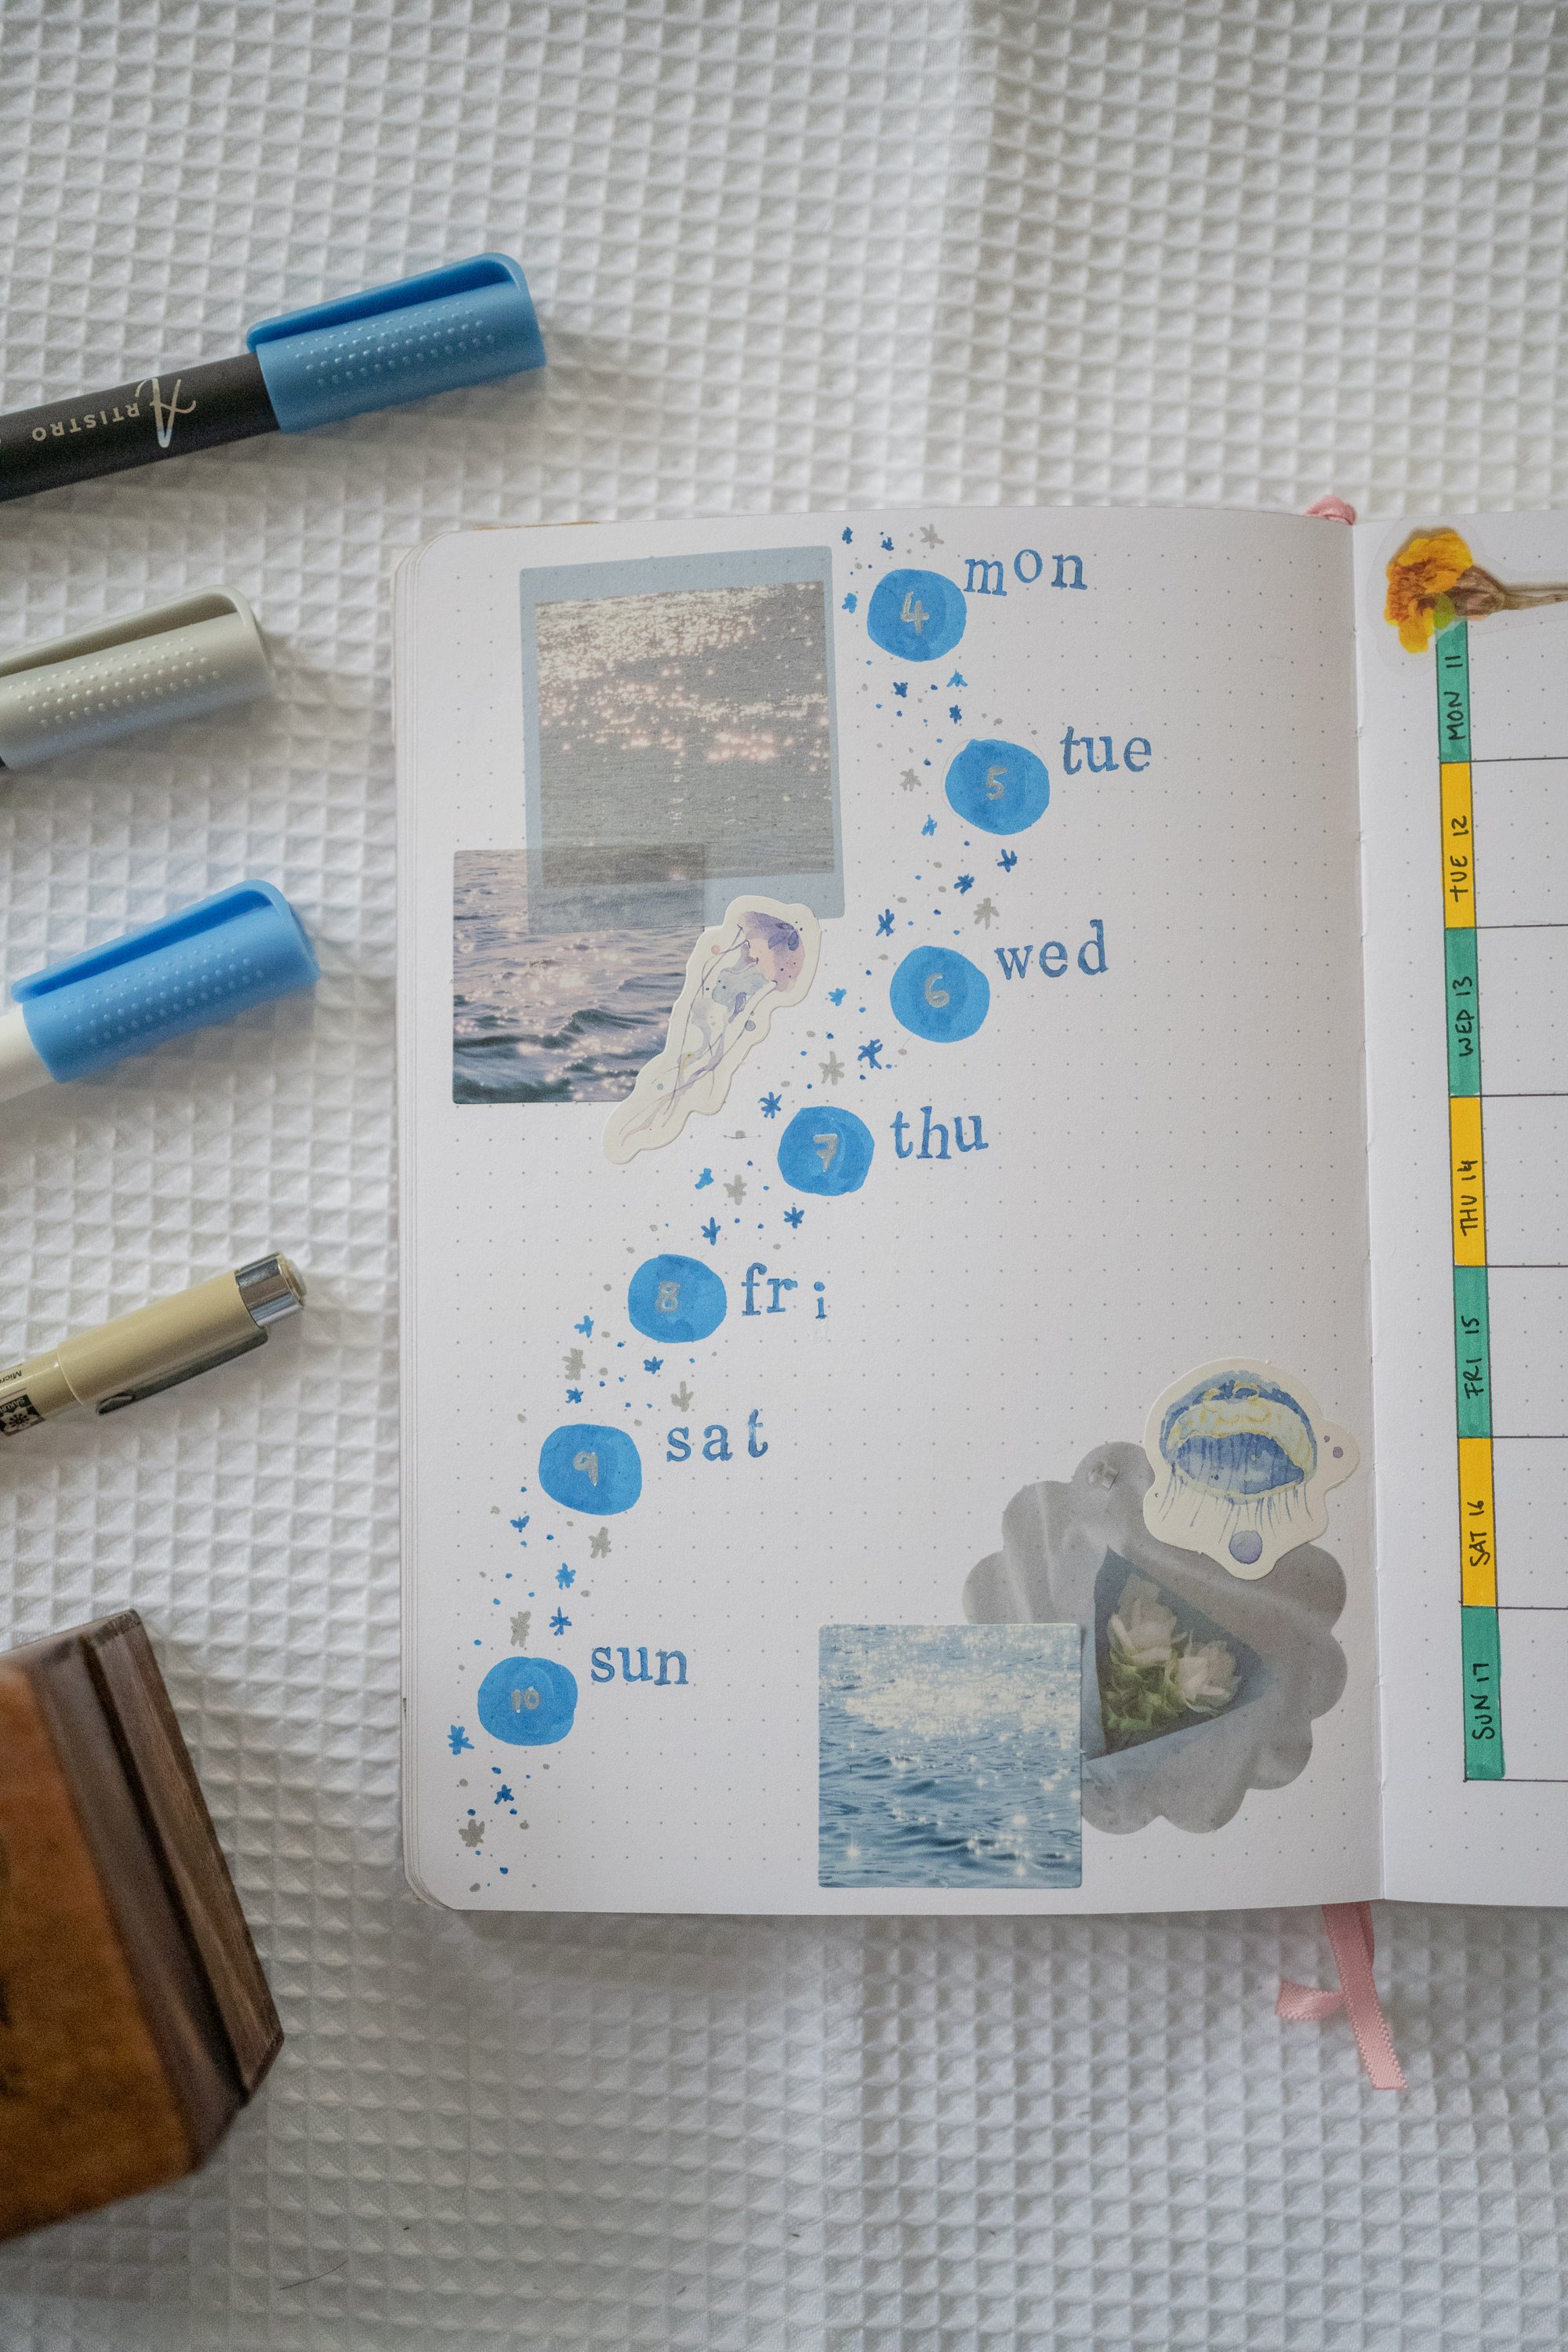
Floating Bubbles Single Page Weekly
If you like things a little loose and flexible, a weekly like this one will suit you!
Single page weeklies are great for anyone who wants to save space in their journal, or just doesn’t need the space that a double-page spread affords for their lifestyle.
I’ve layered stickers in the top left and bottom right corners, then added seven approximately evenly-spaced bubbles - one for each day of the week - hugging the space between the decorations. I didn’t measure the space between those bubbles, I just eyeballed it!
Add a bunch of asterisks and dots between the bubbles, and you’ve got yourself a stardust trail through the week! I used two different blues and a silver pen to get this colour scheme, and I used the same silver over the top of a white paint pen to add the number for each day to the bubbles.
I’ve used lower case letter stamps with my paint pens to add the weekday headings, but you could absolutely just write them in with pen too.
My theme here is oceanic, but you could use whatever stickers and colour scheme you like!
This is the kind of layout that looks AMAZING once it’s all filled in with your events, tasks and musings - it could also work really well for a “a few lines a day” short form journaling page if writing a few full pages a day is a bit too much for you!
Not into stickers?
No worries! You could layer a few strips of washi tape or doodle something beautiful in the corners instead! Just make sure you still leave yourself enough room for planning!


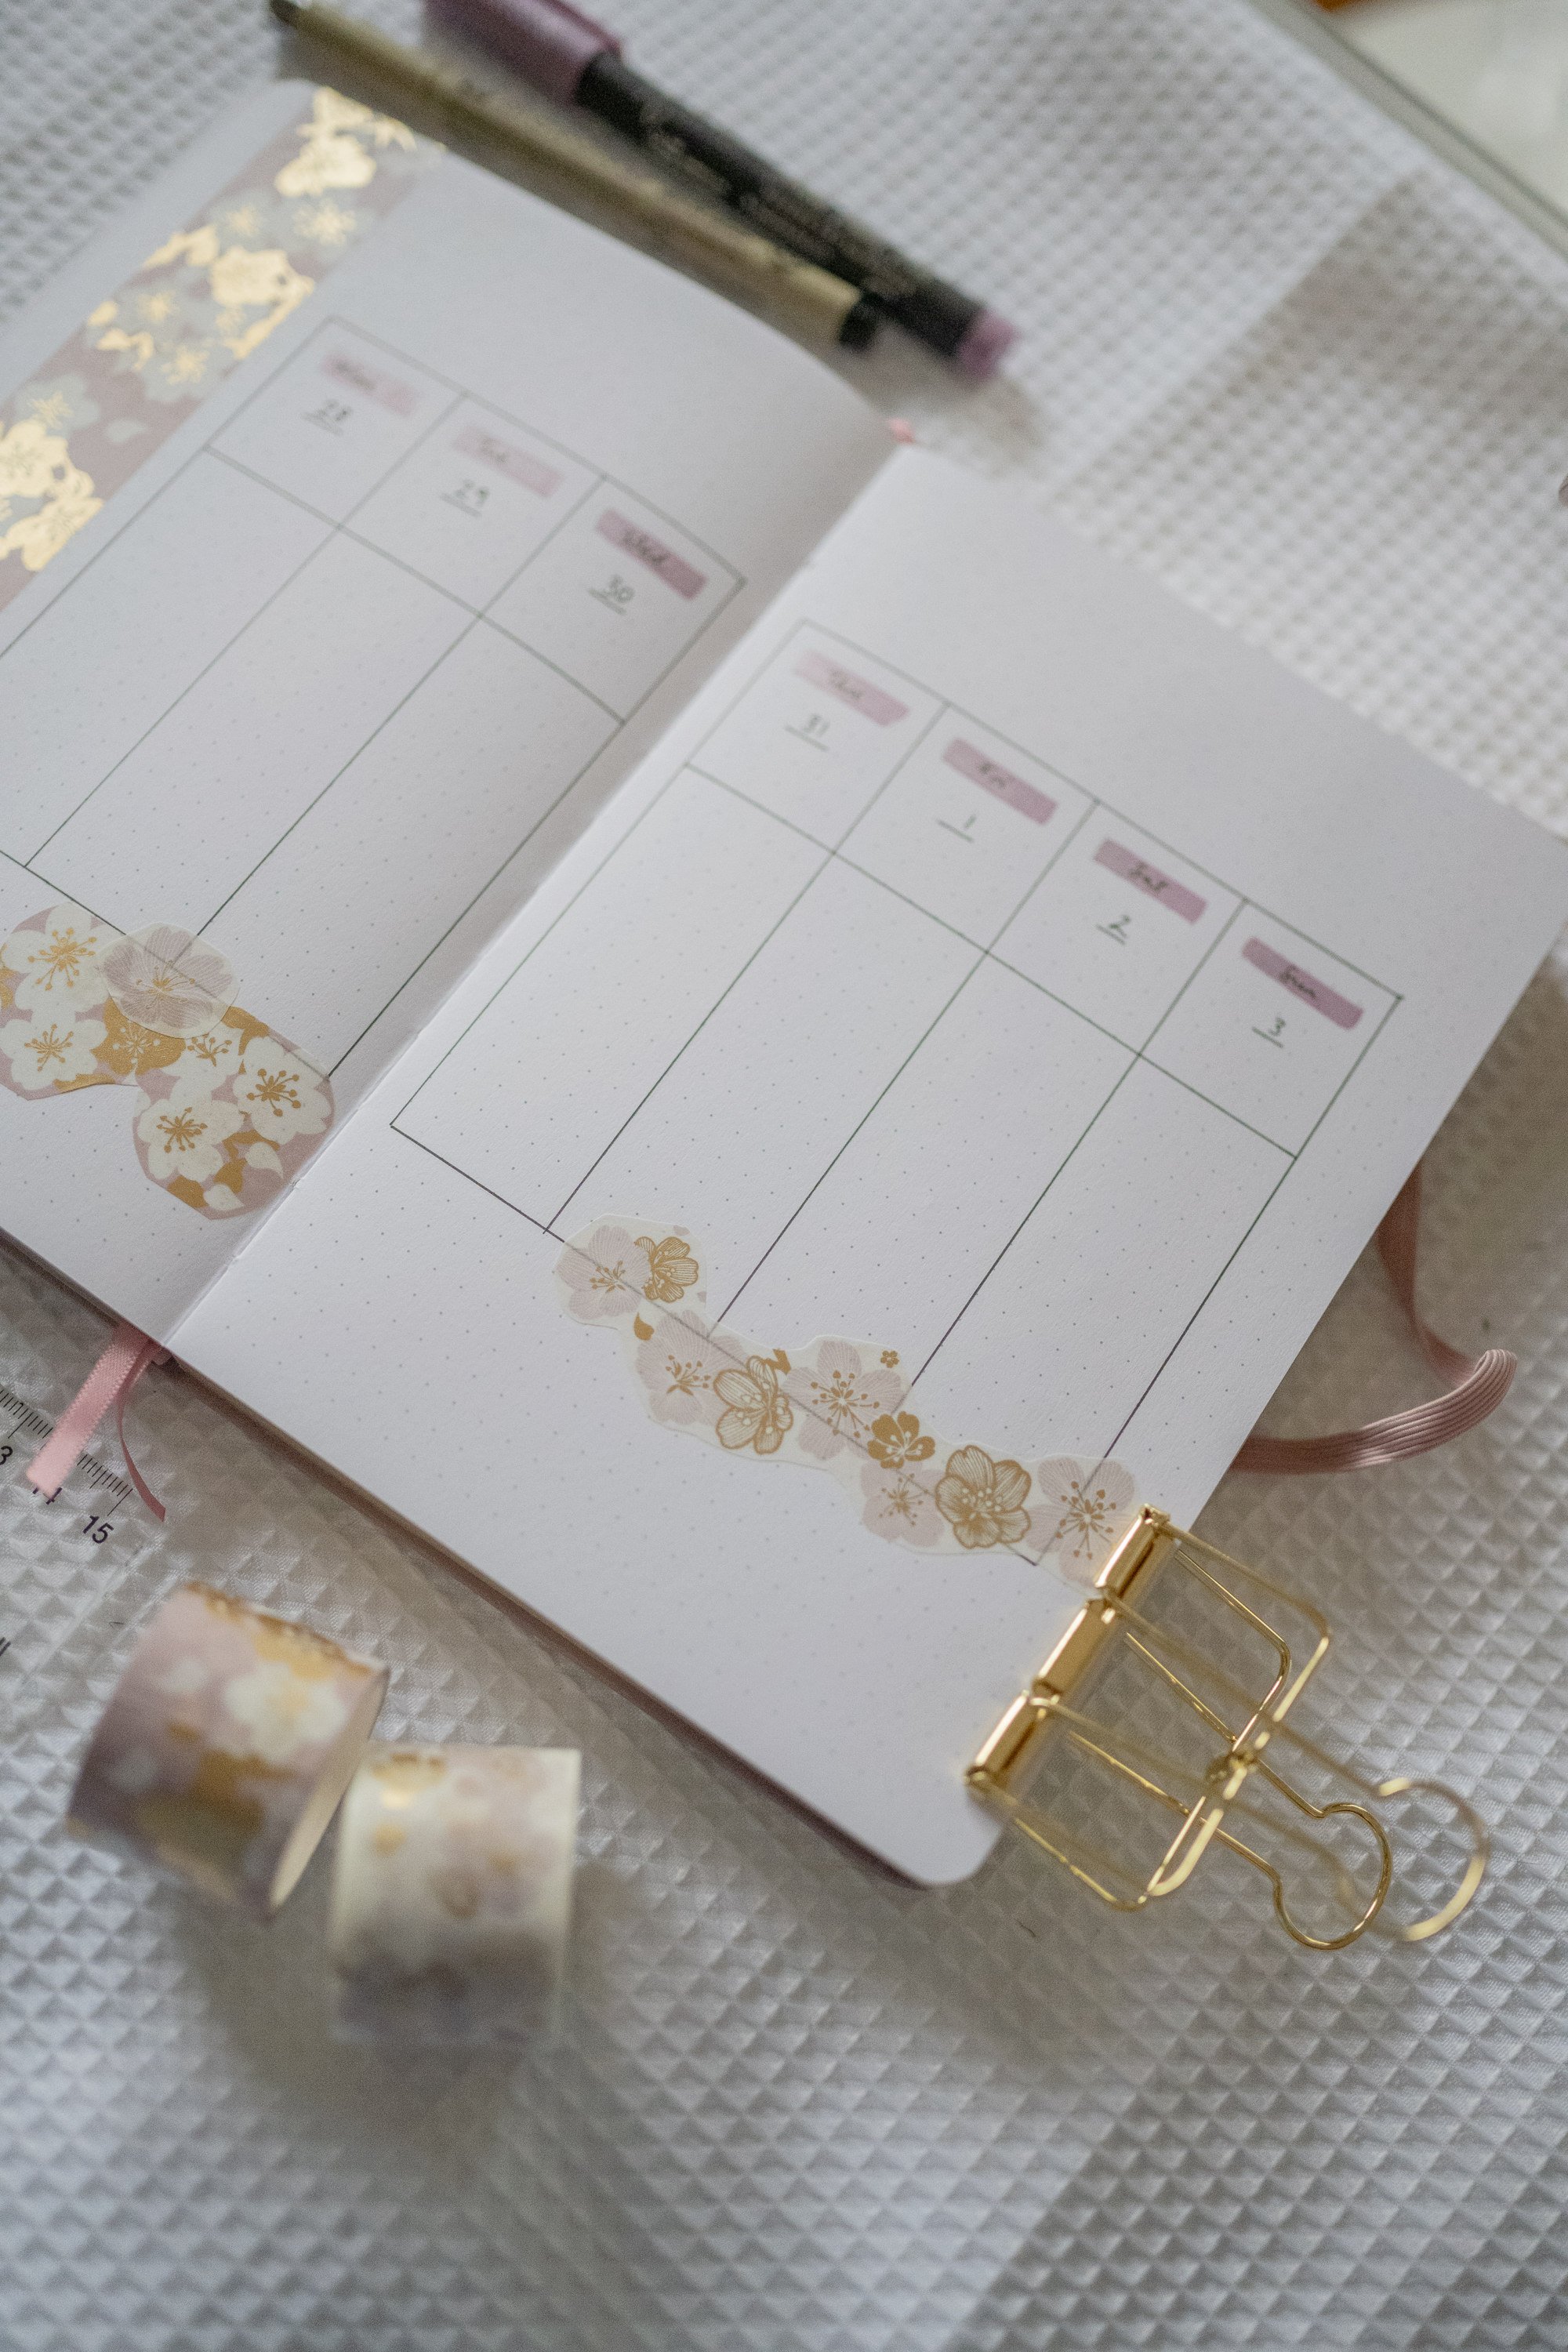
Single Page Weekly with Rolling Task List
Can I be super real with you for a sec? I don’t love the colour scheme I picked for this page. As soon as I had these colours next to each other, all I could see was Aussie sports uniforms! I’m an Aussie, but I’m not sporty or feeling like being particularly patriotic in my bujo!
Despite not vibing with my own colour scheme, I have to vouch for this weekly page. It’s so effective for anyone who needs a LOT of space for tasks that might be relevant over several days. My page has the left column divided into seven daily sections that are five spaces tall by ten spaces wide, with an extra space on the left side allocated to the date. The to do column on the left is 13 spaces wide, and the same height as all the daily boxes combined - working out to 34 spaces tall all up, since the top space is taken up with the heading.
I’m personally a huge fan of rolling task lists like this, where instead of allocating your tasks to specific days, you just add them in the big “to do” column on the right.
I chucked a couple of yellow flower stickers on this layout, but I think it looked better without them! It could have looked great with a few other smaller stickers in softer colours, but I’d already locked myself into the green-and-gold look with the paint pens. Don’t let that put you off - it’s a super effective weekly!
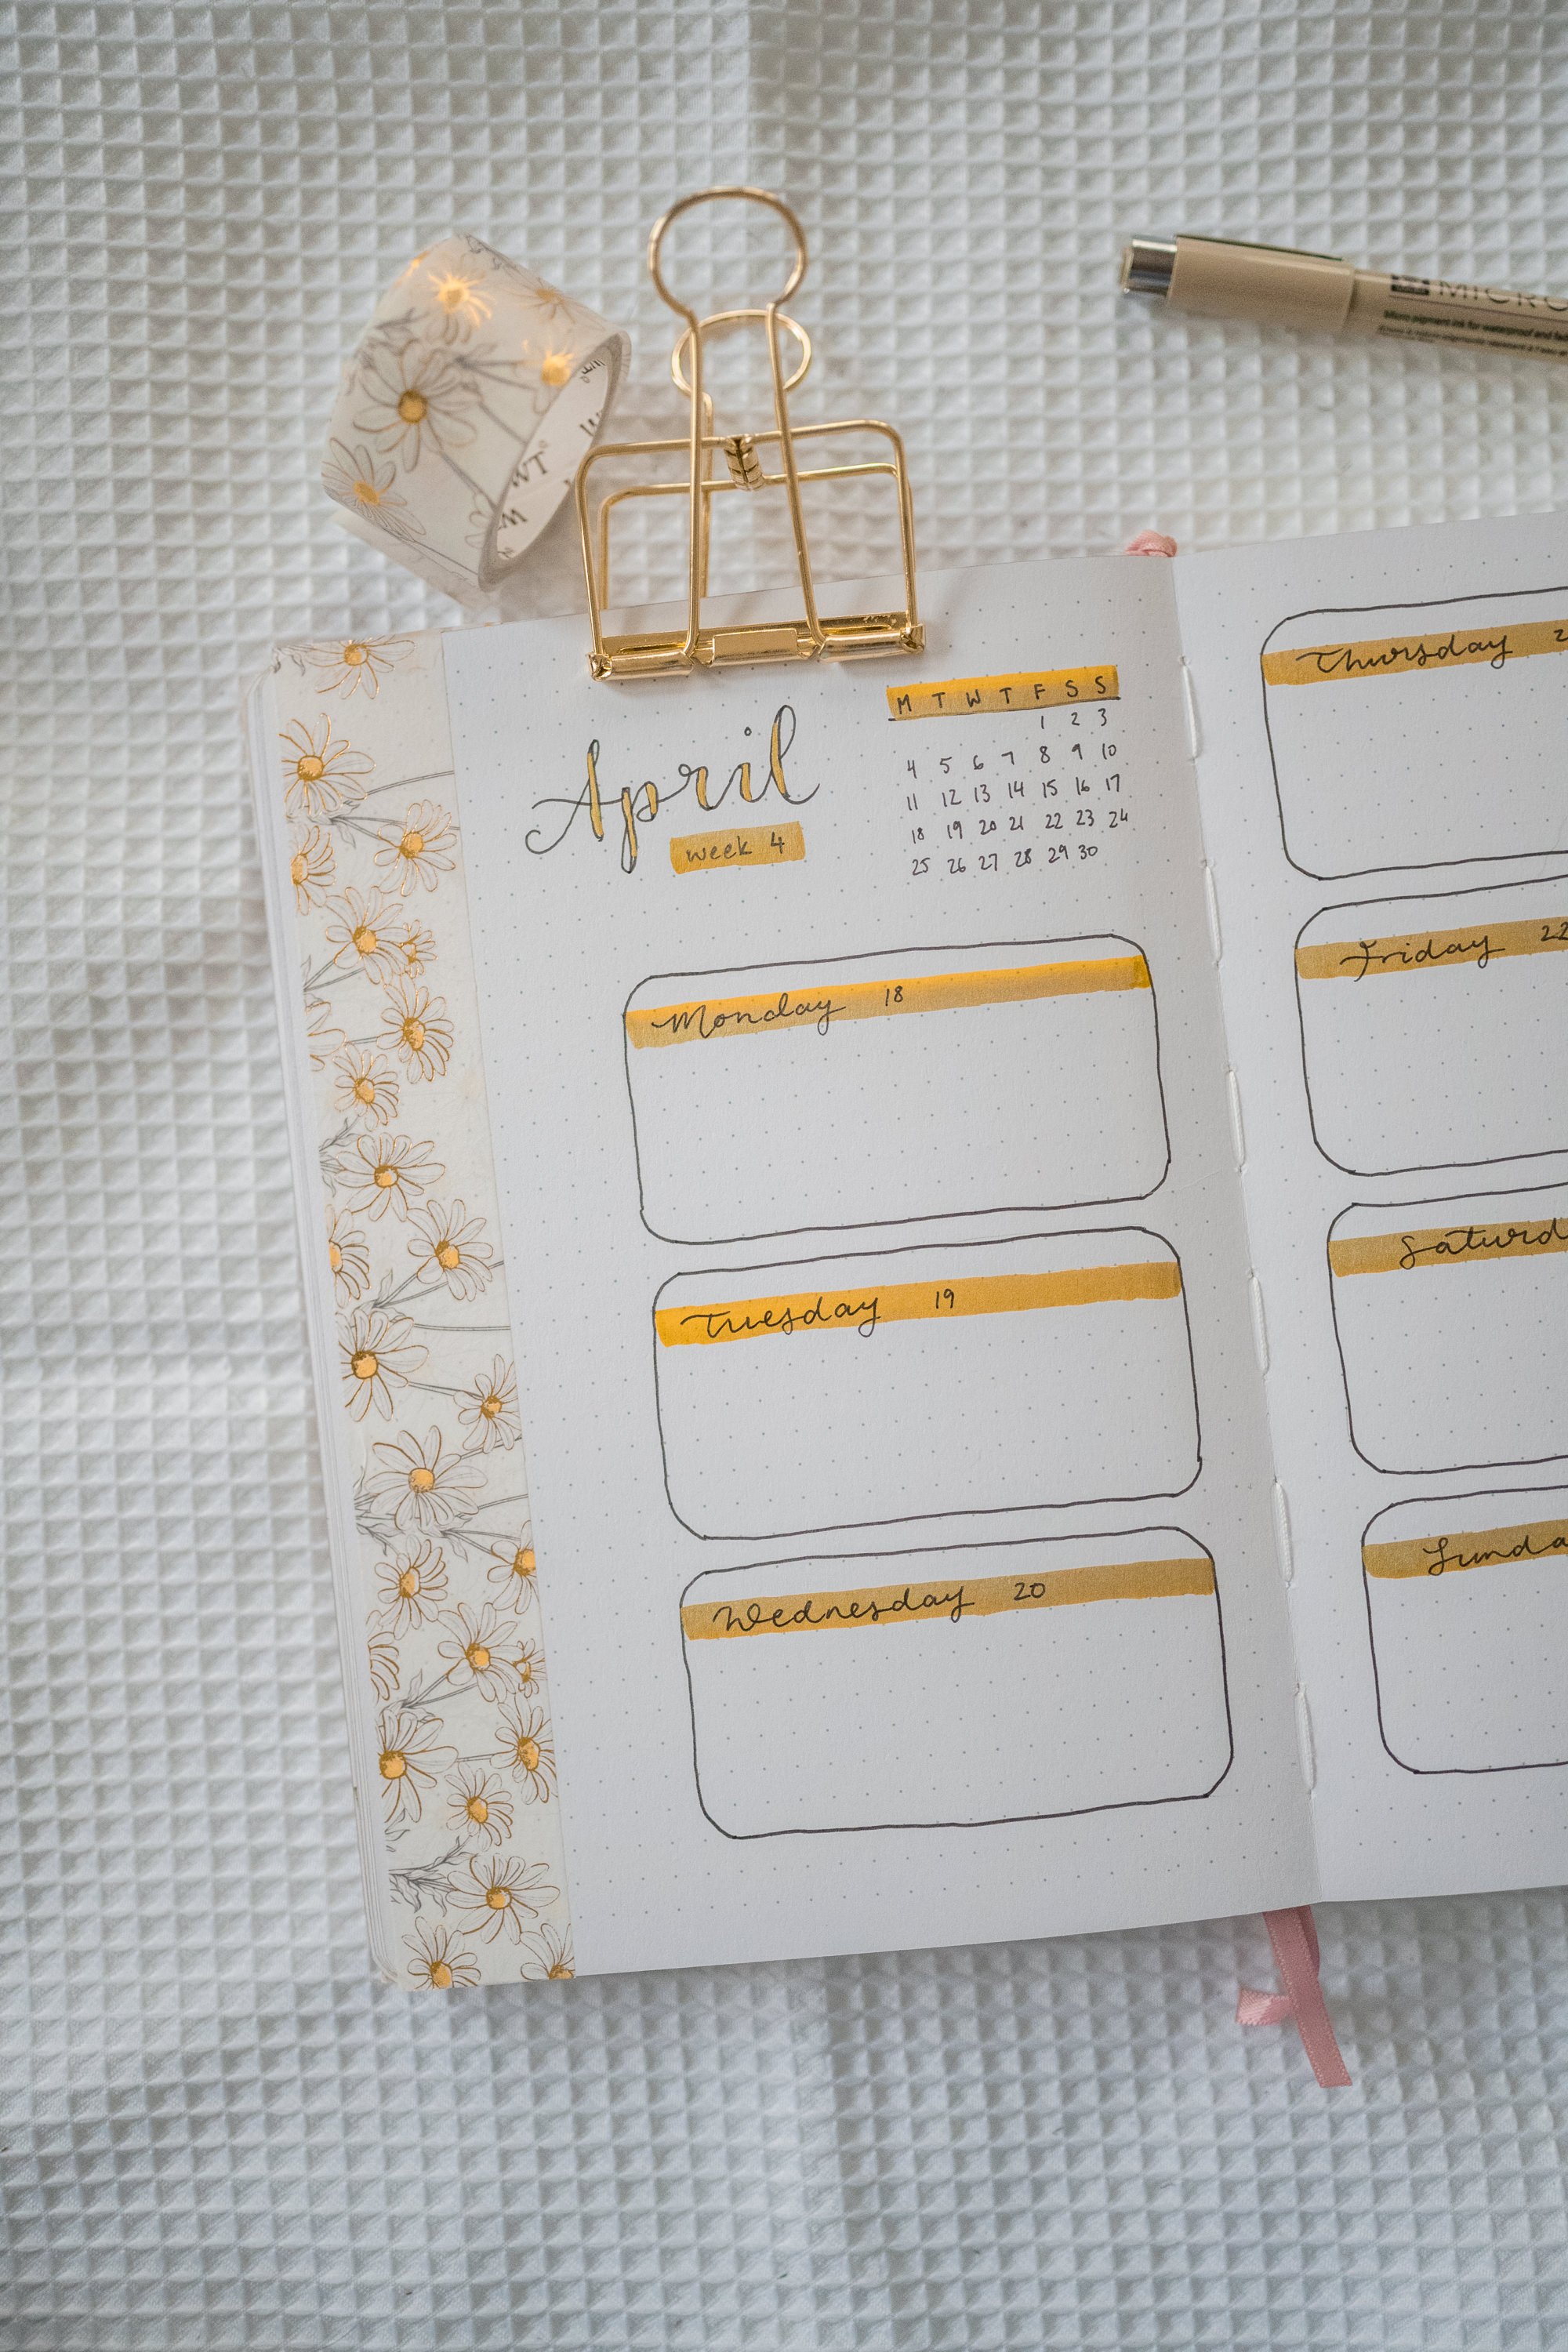
Stacked Boxes Weekly Spread
This one is my favourite - visually - of the four layouts in this post! It’s so simple but so, so pretty. The stacked up boxes remind me of a very chic wardrobe!
This weekly spread would suit anyone who prefers a horizontal layout. I personally would add my tasks and events to each box in two or three columns anyway, I just wouldn’t draw any vertical lines to denote them.
I’ve also used a few metallic elements in this spread, but sadly they don’t photograph so well, so it’s hard to tell.
The daily boxes here are eight spaces tall by 16 spaces wide, and I’ve chosen to round the corners. You could stick to pointy boxes if you’d prefer, or use a ruler - I chose to freehand the lines this time.
To round the corners of your boxes like this, stop your line one space before where you’d normally end it to make a box. Do that on all the sides, then connect them up with a curved edge.
I’ve added a marker line all the way across the second space down in each box, then added the day of the week and the date in a flowing handwritten script.
In the space above the Monday box, I’ve added a tiny calendar so I can keep an eye on the month at a glance as well as the week we’re on, and added an April heading just for fun. You could leave this space empty, or decorate it with more stickers or washi or doodles. Or you could make your heading much bigger than mine, so it takes up the calendar space too!
The washi tape lining the page edges here is from the Washi Tape Shop’s “Fragrance” bundle, and the edges of the daisies shine a lovely metallic gold! I’ve paired them up with a gold metallic paint pen, and while it looks a bit weird in the photos, it looks amazing in real life.